Installation is quick and easy: the WineSupervisor 3 only requires an internet connection and radio synchronization with your Friax to operate.
When unboxing your WineSupervisor 3 contains the following elements:
– A WineSupervisor 3 box
– A 2 meter RJ45 cable
– A USB cord and its transformer (230V – 50Hz // 5V – 0.5A)
– A getting started guide
Follow these few steps to access your online cellar:
1. Connect the RJ45 cable 🌐
Connect the RJ45 cable (supplied) to connect the WineSupervisor to your internet network.
Like the remote control of your device, the box can be moved up to 100m in an open space.
If you have a distance problem, you can pull an RJ45 cable or use a Powerline device to connect through your home’s electrical network.
2. Connect the power ⚡
Connect the USB cable (supplied) to power your WineSupervisor.
You must also turn on the air conditioning unit to be connected.
3. Start synchronization 📡
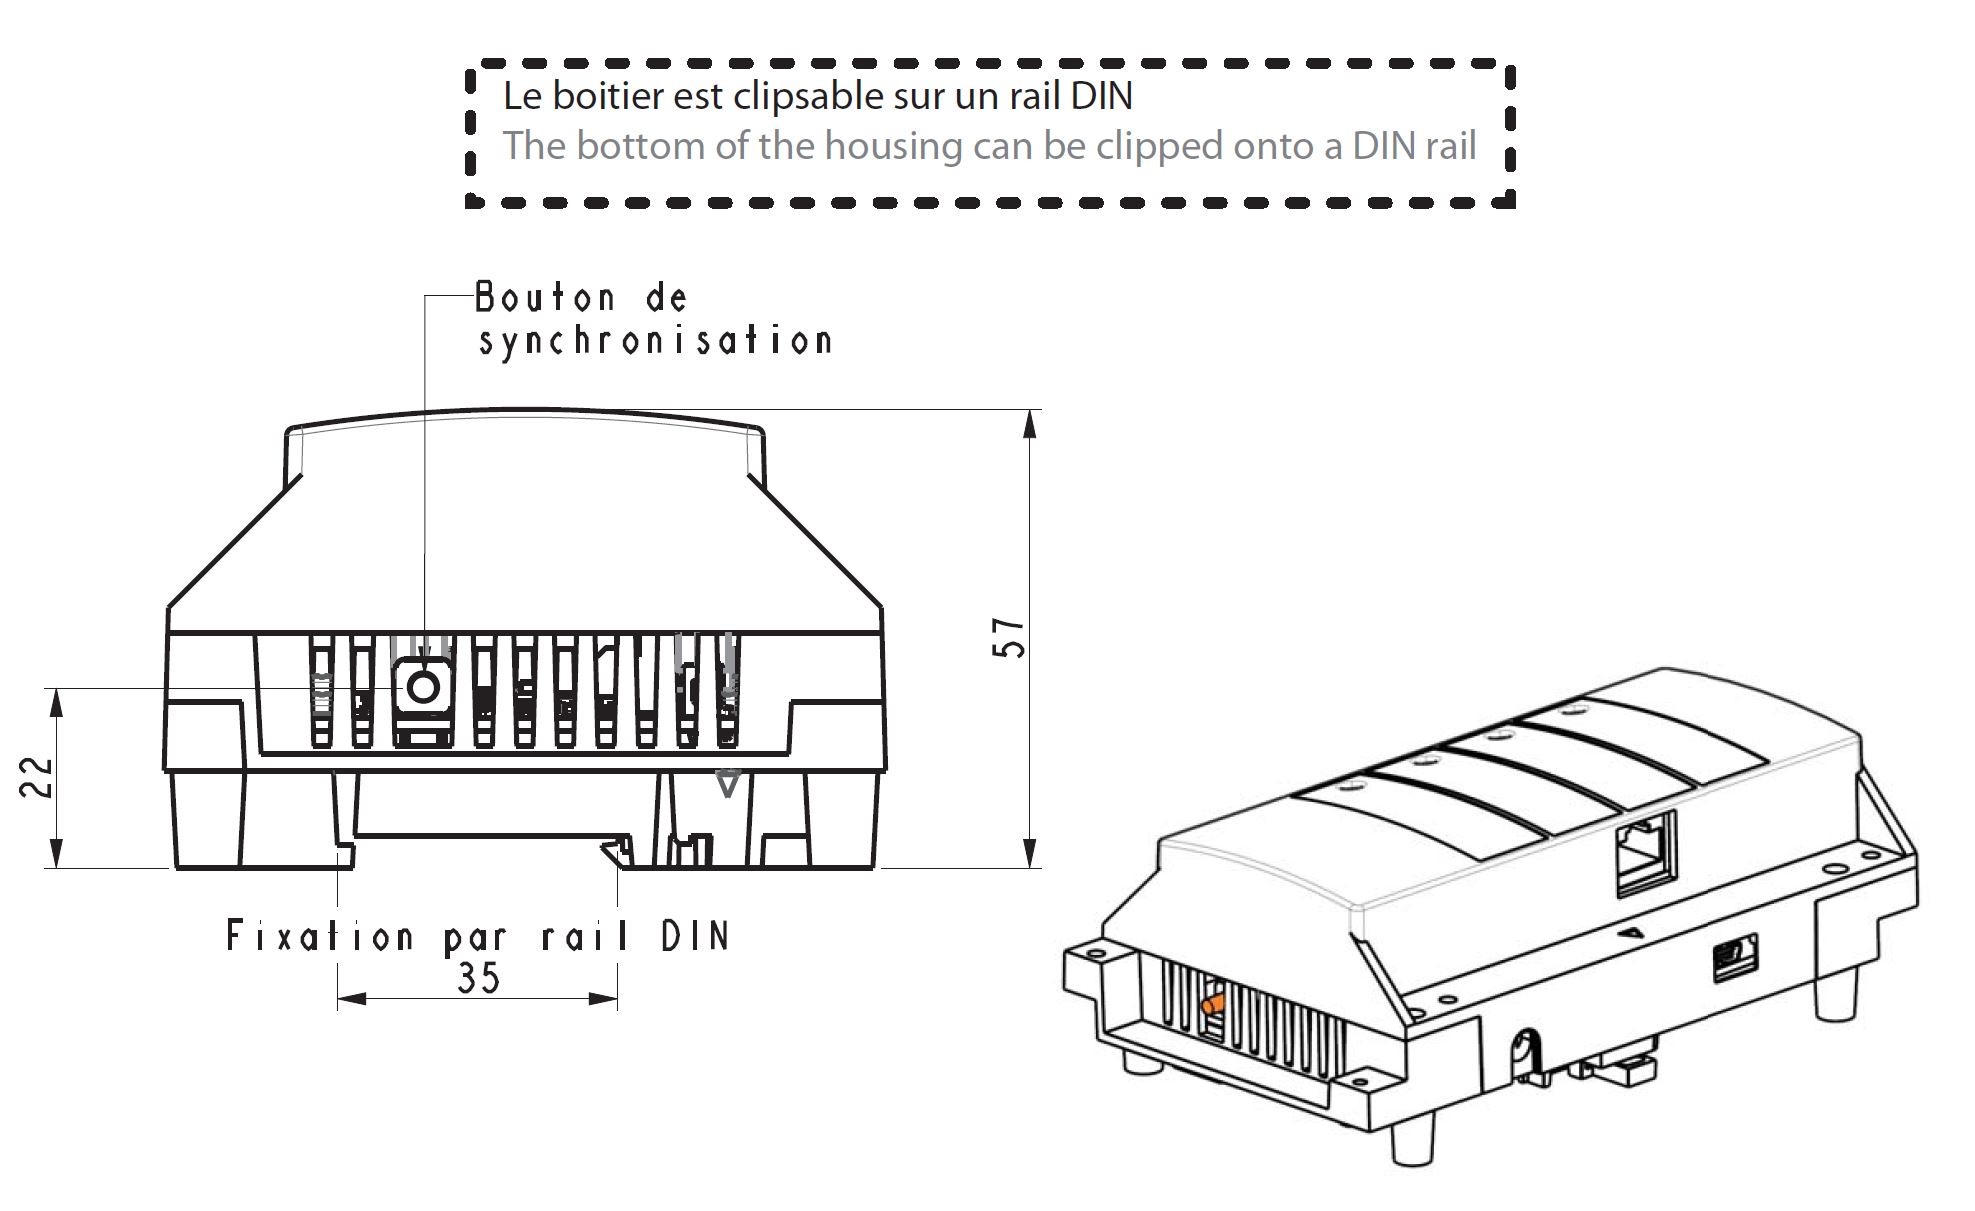
On the WineSupervisor: press the button located at the end of the box for 6 seconds.
The status LED turns orange 🟠
4. Pair the air conditioner 🍷
Go to the LED indications on the control box or directly on the front of your device.
Using a tip, press the synchronization button for 6 seconds located directly next to the LEDs.
The status LED turns red 🔴 or green 🟢
5. Complete the synchronization 😀
From the remote control, press RETURN for 6 seconds ↩
If the screen displays INIt rF you can validate with OK
Your cellar is almost ready!
Once the installation is complete, simply follow the steps to activate the cellar directly on your WineSupervisor account.
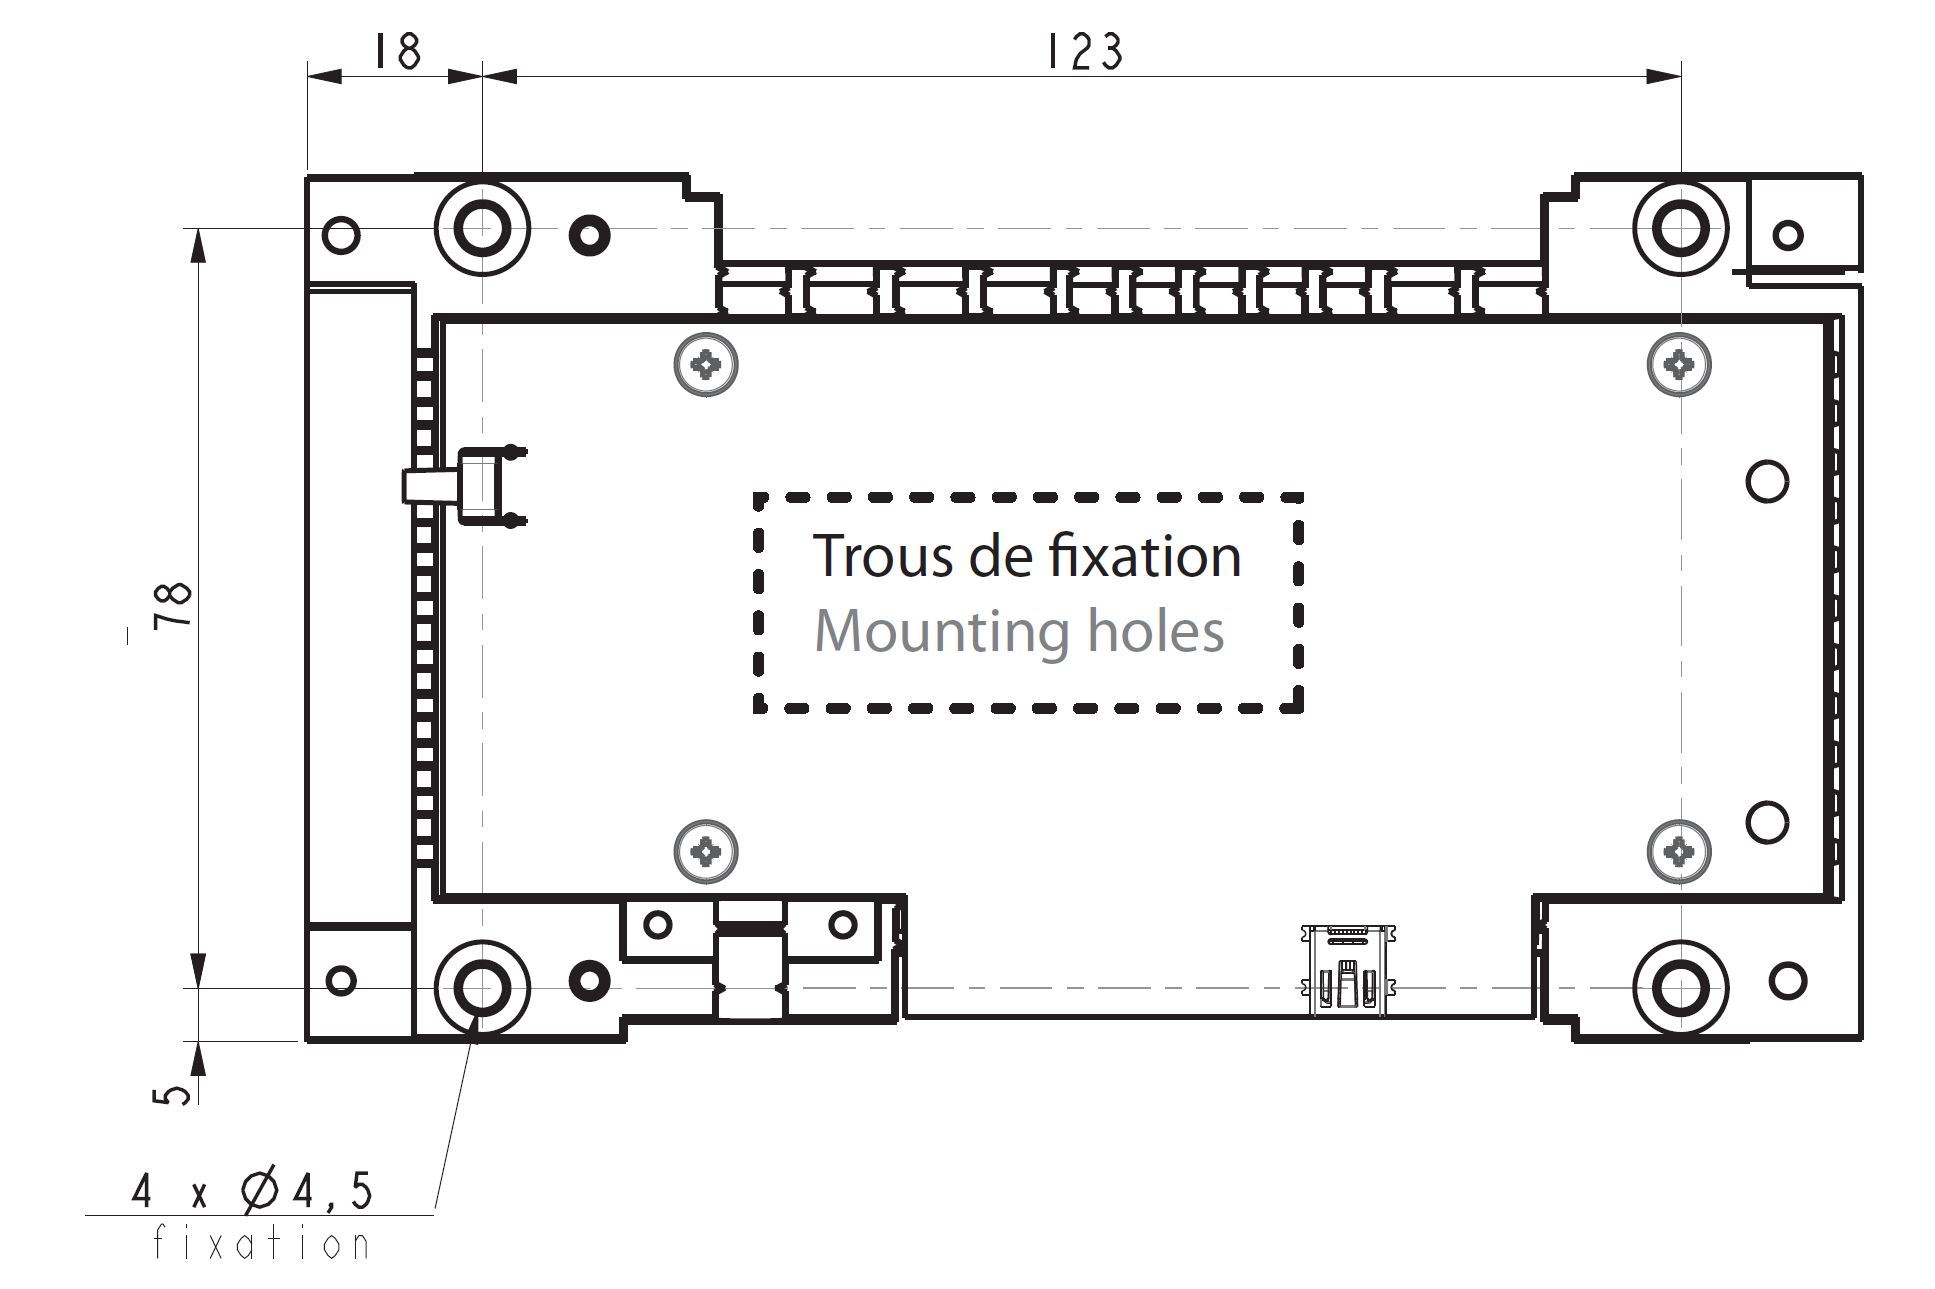
Some technical details for the implementation